
Tutorial: Learn how to automatically discover and classify sensitive data in your Amazon S3 buckets with Nightfall's sensitive data scanner to facilitate data loss prevention (DLP).
In this tutorial, we will walk through the end-to-end process of scanning your Amazon S3 buckets for sensitive data with Nightfall's S3 Sensitive Data Scanner. By the end of this tutorial, you will have an exported spreadsheet report (CSV) of the sensitive data in your S3 buckets. You can then use this report in your data loss prevention (DLP) efforts to remediate/remove sensitive content for better security/privacy or use it as part of your compliance efforts, for example in relation to PCI-DSS.
Background
Organizations store high volumes of business-critical information in Amazon S3, such as personally identifiable information (PII), credit card information, secrets & credentials, and more. Identifying and protecting sensitive data in Amazon S3 is increasingly time-consuming, complex, and expensive, especially as your organization takes on more data.
Data leaks and improper storage in S3 can lead to compliance violations such as PCI-DSS, HIPAA, FedRAMP, and other compliance requirements. This tutorial will give you the ability to get visibility into the sensitive data that lives in your S3 buckets, which is the first step in having a DLP strategy for S3 and developing a strong security posture in the cloud.
Prerequisites
This tutorial will take about 15 minutes to complete, and in order to complete it you will need access to your AWS Management Console with sufficient permissions to create/edit IAM roles, permission policies, user groups, and if applicable, encryption keys.
You'll also need a Nightfall account, but don't worry if you don't have one yet, as we'll create one later in the tutorial. You'll be able to scan up to 3 GB of data per month for free (no credit card required), and can upgrade at any time to the Usage tier to scan an unlimited amount of data, starting at $3 per GB per month (and scaling down with volume).
Create an IAM Role
First we will create an IAM role for the Nightfall Sensitive Data Scanner to use to access S3 buckets.
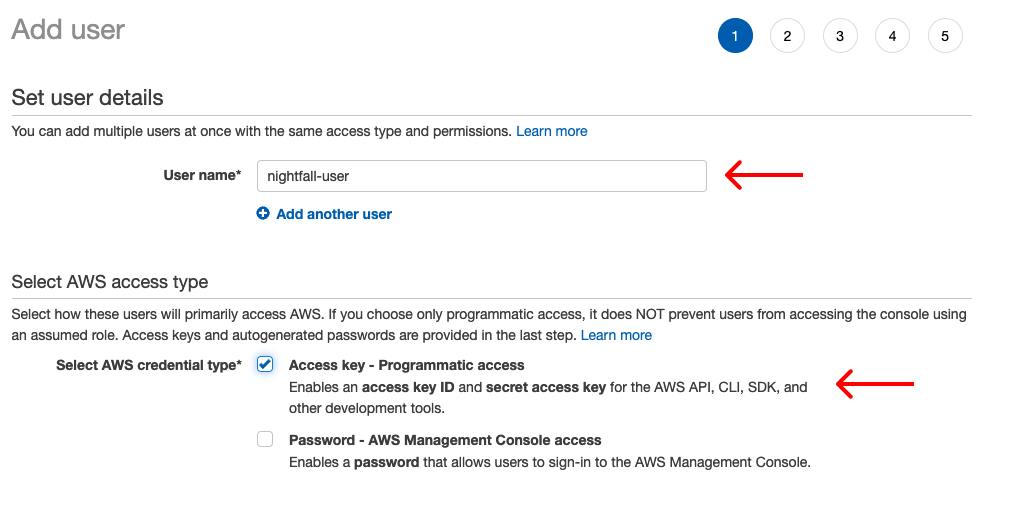
- Navigate to IAM in the AWS Management Console. Select Users in the left navigation and Add users

- In the User name field enter a name for Nightfall's user role such as nightfall-scanner
- Under Select AWS access type select Access key - Programmatic access and click Next
- On the Permissions page, select Add user to group and click Create group
- Give the group a name like nightfall-scanner-group and click Create policy
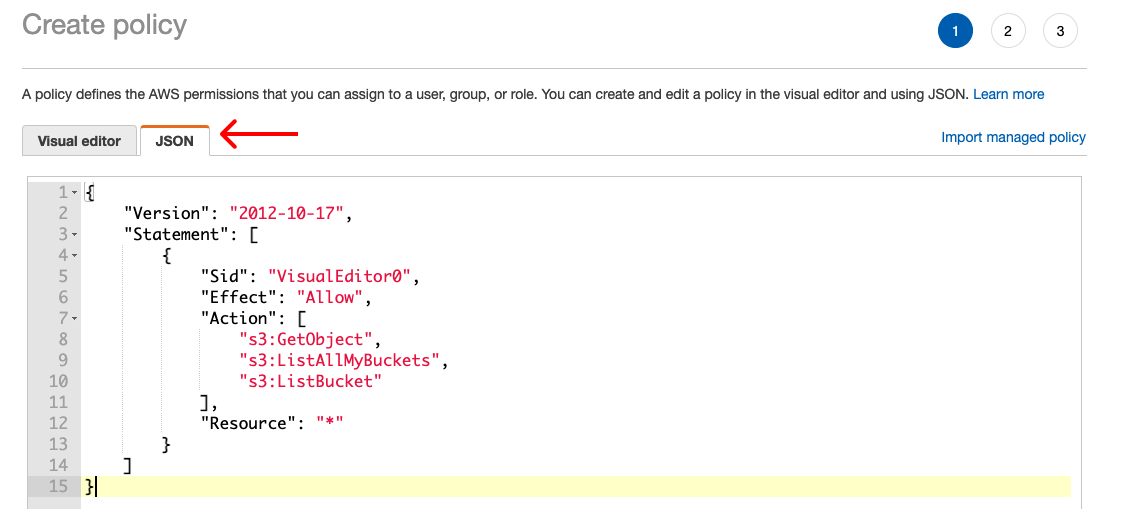
- This will take you to the Policy creator in a new tab. Click the JSON tab, and paste the following policy:
{
"Version": "2012-10-17",
"Statement": [
{
"Sid": "VisualEditor0",
"Effect": "Allow",
"Action": [
"s3:GetObject",
"s3:ListAllMyBuckets",
"s3:ListBucket"
],
"Resource": "*"
}
]
}
It will end up looking like this in the UI:
- Click Next. Skip the Tags page and click Next: Review
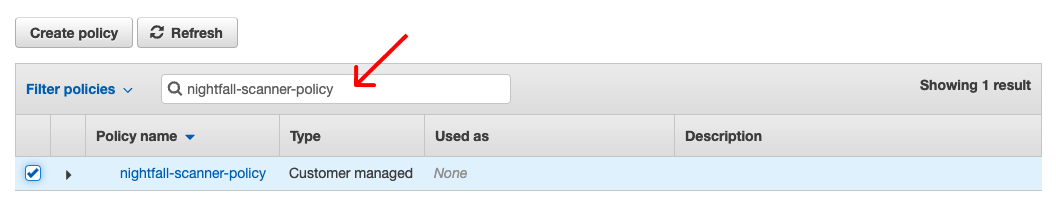
- Give your policy a name like nightfall-scanner-policy and click Create

- Now flip back to the Create group modal in your other tab window, click the Refresh button, and search for your newly created policy. Check box this policy and click Create group
- Click Next: Tags and leave this blank, and click Next: Review
- Confirm that you've completed the steps above correctly and click Create user

Now you will be presented with your Access key ID and Secret access key. Download the CSV file with these credentials or otherwise copy them locally. Keep this information safe as it allows for access to your S3 account, per the permissions we just assigned. You will need these credentials to run your S3 scan in a later step.
Assign Key Access (if needed)
Note: If you don't have KMS encryption enabled on the files that you wish to scan, you can skip down the next section.
If you have files in S3 that you wish to scan that have server-side encryption enabled, you will need to grant access to this user to the assigned KMS key in order to open these files. You can check if a file has server-side encryption enabled with Amazon KMS by navigating to the file in the S3 file browser in the AWS Management Console.

To grant access to the key, navigate to KMS in the AWS Management Console.
- Click Customer managed keys in the left sidebar and select the relevant key from the list
- Under Key users click Add and select the IAM user we just created above nightfall-scanner. Nightfall will then be able to scan files encrypted with this key.

Repeat these steps for any and all keys that encrypt files that you wish for Nightfall to scan.Now we have completed the steps required for Nightfall to access and scan the appropriate resources in your AWS account. We will transition over to configuring Nightfall itself.
Configure Detection
You have the ability to customize Nightfall's detection engine by inputting your own Nightfall API key. This gives you granular control over what Nightfall detects and is powered by the Nightfall Developer Platform. You can select from our library of high-accuracy, pre-built detectors, or build your own custom detectors.
If you don't specify an API key, Nightfall will fallback to use a default detection rule that detects likely credit card numbers, US social security numbers, and API keys.
How does pricing work? It's free to get started with the Nightfall Developer Platform and to create your own API key. No credit card is required. You'll be able to scan up to 3 GB of data per month for free without a credit card.
On the Free tier, scanning will stop when your API key reaches its 3 GB monthly limit. Add your credit card to upgrade to our Usage tier, which is billed at a starting rate of $3 per GB scanned. You'll pay only for what you use with your Nightfall API key.
If you have questions or concerns about costs based on the data volumes you are looking to scan, reach out to us at support@nightfall.ai to discuss our Enterprise plan.
Read more about pricing in our API Docs.
- First, log in to your Nightfall Dashboard (app.nightfall.ai). If you don't have an account, sign up for a free account here (app.nightfall.ai/sign-up).
- Once you're logged in to the Dashboard, click Detection Rules in the left sidebar.
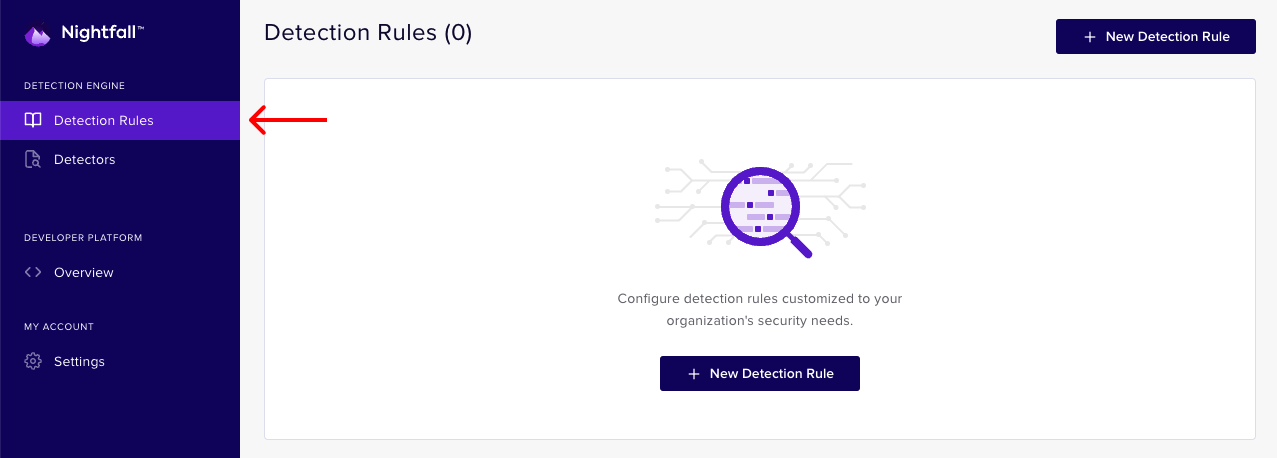
- Click New detection rule and give the detection rule a name like My First Detection Rule
- In this example, we'll create a detection rule that matches the default detection rule described above
- Click + Detectors and scroll through the list or type in the search bar to find Credit card number, US Social Security number, and API key - select all three
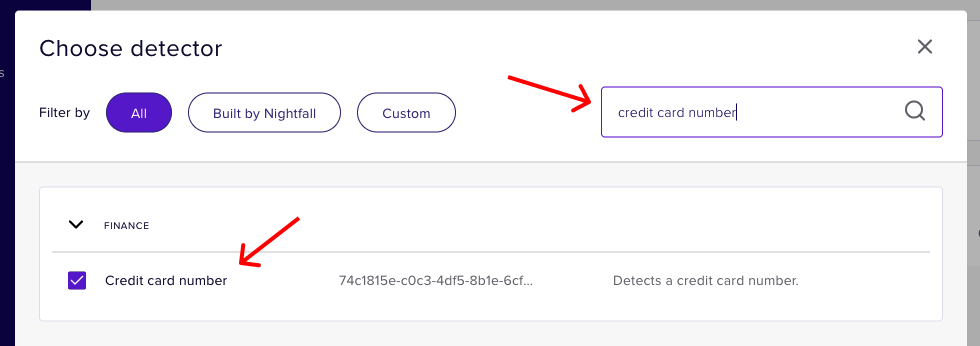
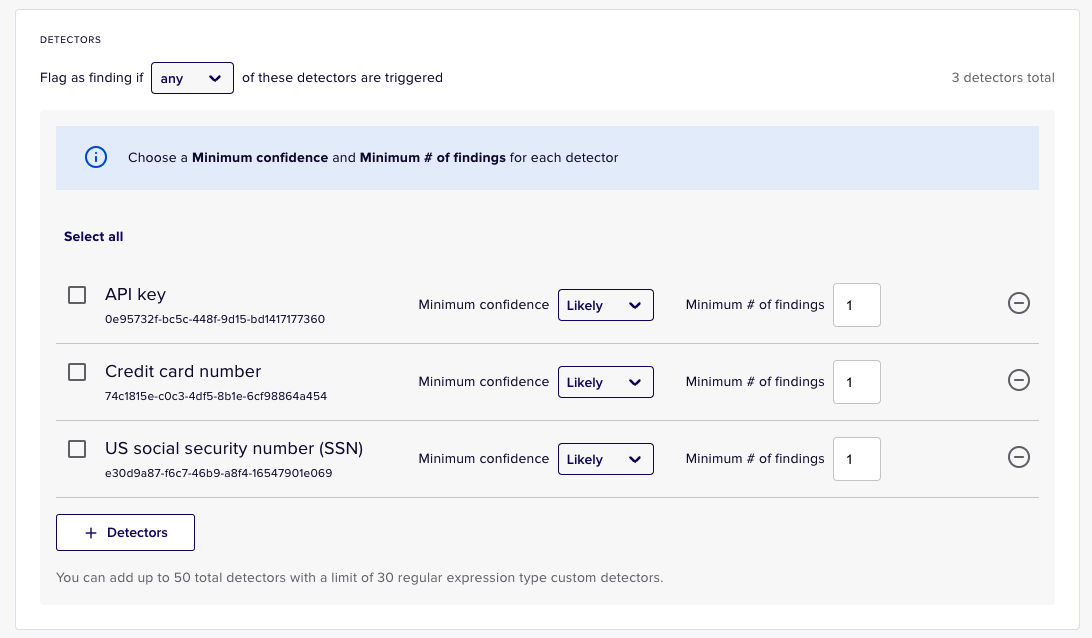
- Click Confirm and you should see the added to your detection rule as follows
- We will leave the rest of the default settings here as is, we can always come back to fine tune our detection rule later. Click Save Detection Rule
- You'll now see the detection rule in your list of detection rules. Note down the Detection Rule UUID as we will need this later when configuring our scan and telling Nightfall what detection rule we want to use. If you hover over it, you'll be able to copy it to your clipboard.

Did you know? The S3 scanner supports multiple detection rules. Create up to 10 detection rules and list them all in your scan settings for more advanced detection configuration.
Create API Key
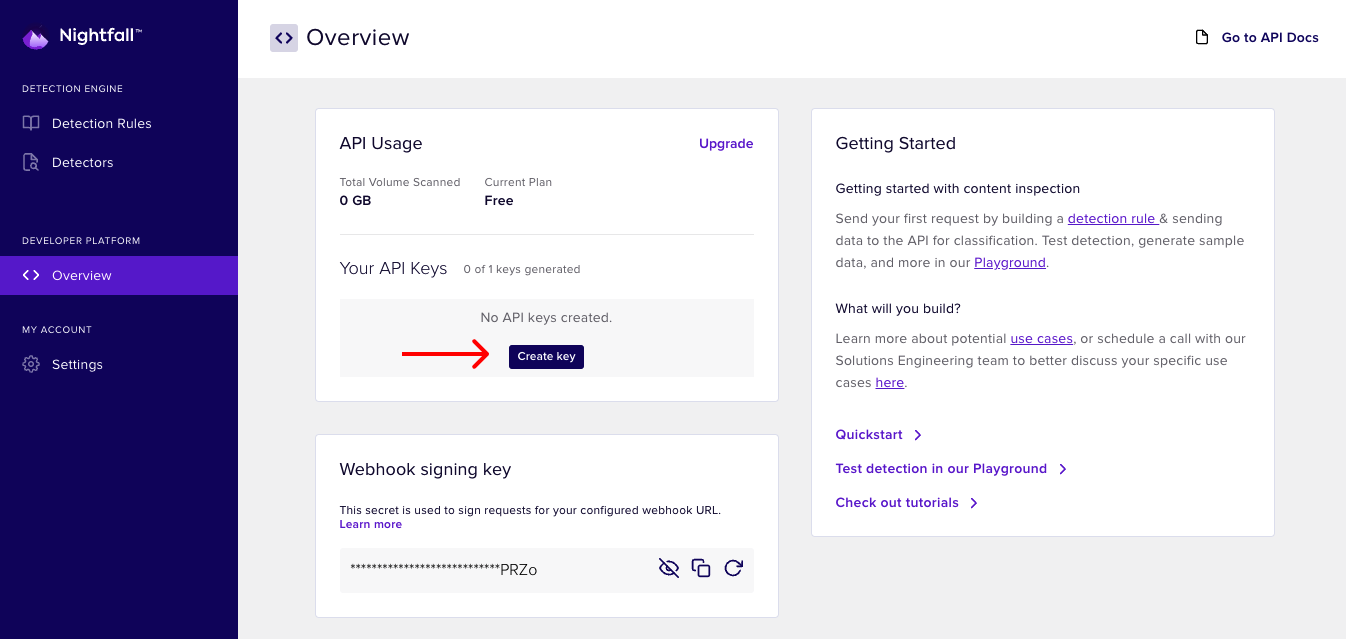
- Next, navigate to the Overview tab under the Developer Platform header in the left sidebar.
- We'll create our first API key that we'll use for the scan. Click Create key and give it a name like my-first-key
- Copy the key locally to a file or environment variable as you will not be able to see they key again, and you will need to reference the key when starting your scan
Start Scan (API-based)
Now that Nightfall can access your S3 buckets and you’ve configured detection, you’re ready to kick off a scan using the Nightfall File Scan API. In this flow, you’ll stream each S3 object to Nightfall, then trigger a scan against your Detection Policy. Results are delivered asynchronously to your webhook (configured on the policy) for storage or reporting. This replaces the legacy S3 Sensitive Data Scanner UI. (Nightfall AI)
What you need
- Nightfall API key and a Detection Policy (with your webhook URL).
- AWS credentials that can ListBucket and GetObject for the buckets/keys you want to scan.
- Optional: If objects are KMS-encrypted, grant your IAM principal Key user access to the relevant CMKs (described above).
For end-to-end S3 + API guidance, see our Amazon S3 tutorial and Scan API docs at help.nightfall.ai.
Python example: scan an S3 bucket
This script lists objects under a prefix, streams each file to Nightfall using the chunked upload endpoints, then starts a scan against your Detection Policy. Findings will be sent to your webhook.
import os, boto3, mimetypes, json, requests, concurrent.futures
NIGHTFALL_API_KEY = os.environ["NIGHTFALL_API_KEY"]
POLICY_UUID = os.environ["NF_POLICY_UUID"] # Detection Policy with webhook
NIGHTFALL_BASE = os.environ.get("NIGHTFALL_BASE", "https://api.nightfall.ai/v3")
AWS_REGION = os.environ.get("AWS_REGION", "us-west-2")
S3_BUCKET = os.environ["S3_BUCKET"] # e.g., "my-bucket"
S3_PREFIX = os.environ.get("S3_PREFIX", "") # optional
MAX_BYTES = int(os.environ.get("MAX_BYTES", str(512 * 1024 * 1024))) # 512MB cap
session = boto3.session.Session(region_name=AWS_REGION)
s3 = session.client("s3")
def _hdr(extra=None):
h = {"Authorization": f"Bearer {NIGHTFALL_API_KEY}"}
if extra: h.update(extra)
return h
def initiate_upload(size, mime=None):
payload = {"fileSizeBytes": size}
if mime: payload["mimeType"] = mime
r = requests.post(f"{NIGHTFALL_BASE}/upload",
headers={**_hdr(), "Content-Type": "application/json"},
json=payload, timeout=60)
r.raise_for_status()
d = r.json()
return d["id"], d["chunkSize"]
def upload_chunks(upload_id, body, chunk_size):
offset = 0
while True:
chunk = body.read(chunk_size)
if not chunk: break
r = requests.patch(f"{NIGHTFALL_BASE}/upload/{upload_id}",
headers=_hdr({"X-Upload-Offset": str(offset),
"Content-Type": "application/octet-stream"}),
data=chunk, timeout=120)
r.raise_for_status()
offset += len(chunk)
def finish_upload(upload_id):
r = requests.post(f"{NIGHTFALL_BASE}/upload/{upload_id}/finish",
headers=_hdr({"Content-Type": "application/json"}),
data='""', timeout=60)
r.raise_for_status()
def start_scan(upload_id, policy_uuid, meta=None):
payload = {"policyUUID": policy_uuid}
if meta:
payload["requestMetadata"] = json.dumps(meta)[:10_000]
r = requests.post(f"{NIGHTFALL_BASE}/upload/{upload_id}/scan",
headers=_hdr({"Content-Type": "application/json"}),
json=payload, timeout=60)
r.raise_for_status()
def should_scan(obj_head, key):
size = obj_head["ContentLength"]
if size == 0 or size > MAX_BYTES:
return False
ctype = obj_head.get("ContentType")
if not ctype or ctype == "binary/octet-stream":
guess, _ = mimetypes.guess_type(key)
ctype = guess or "application/octet-stream"
# adjust types as needed
return ctype.startswith("text/") or ctype in {
"application/pdf",
"application/json",
"application/msword",
"application/vnd.ms-excel",
"application/vnd.ms-powerpoint",
"application/vnd.openxmlformats-officedocument.wordprocessingml.document",
"application/vnd.openxmlformats-officedocument.spreadsheetml.sheet",
"application/vnd.openxmlformats-officedocument.presentationml.presentation",
}
def scan_key(key):
head = s3.head_object(Bucket=S3_BUCKET, Key=key); head["Key"] = key
if not should_scan(head, key):
return {"key": key, "status": "skipped"}
size = head["ContentLength"]
ctype = head.get("ContentType") or mimetypes.guess_type(key)[0]
upload_id, chunk_size = initiate_upload(size, ctype)
obj = s3.get_object(Bucket=S3_BUCKET, Key=key)
upload_chunks(upload_id, obj["Body"], chunk_size)
finish_upload(upload_id)
meta = {"s3_bucket": S3_BUCKET, "s3_key": key, "size": size, "contentType": ctype}
start_scan(upload_id, POLICY_UUID, meta)
return {"key": key, "status": "scan_started"}
def list_keys(bucket, prefix=""):
paginator = s3.get_paginator("list_objects_v2")
for page in paginator.paginate(Bucket=bucket, Prefix=prefix):
for it in page.get("Contents", []):
yield it["Key"]
if __name__ == "__main__":
keys = list(list_keys(S3_BUCKET, S3_PREFIX))
with concurrent.futures.ThreadPoolExecutor(max_workers=int(os.environ.get("WORKERS", "4"))) as pool:
for res in pool.map(scan_key, keys):
print(res)
Handling results
- File scan findings are posted to your webhook configured on the Detection Policy. Store them in a database, ship to your SIEM, or generate CSV reports as needed. (help.nightfall.ai)
If you need a lightweight starting point for using the Scan API with Python, refer to the “Using Scan API (with Python)” guide. (help.nightfall.ai)
What's Next?
Now that you've run your first scan, you can:
- Fine tune your detection rules and add your own custom detectors
- Identify opportunities to remove, encrypt, restrict sensitive content
- Use generated reports for compliance with regimes like PCI-DSS, HIPAA, and GDPR
- Scan additional AWS accounts, regions, and buckets to cover more of your cloud footprint
- Run S3 DLP scans on a routine basis, such as monthly
- Consider scanning other systems with Nightfall - we have similar scanners with apps like Zendesk, Jira, and more here (playground.nightfall.ai/scanners), and provide complete, native DLP functionality for apps like Slack and Google Drive

.svg)
.svg)


